Table of Contents
QRZ
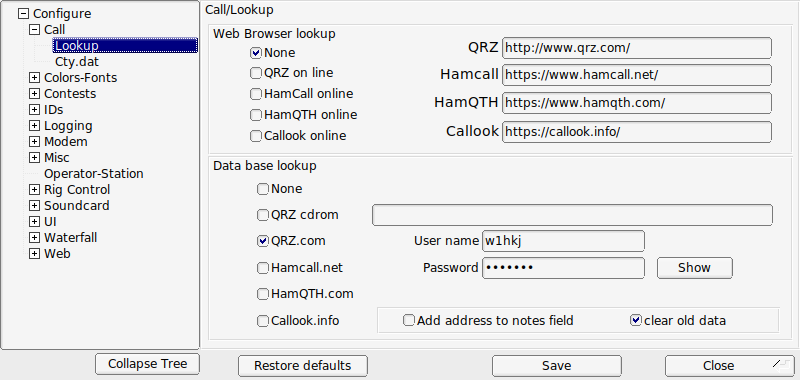
Fldigi will open a web browser to either QRZ.com or Hamcall.net with the contents of the QSO Call field used as a query string to the on line service. You may find that your default browser needs to be triggered twice on the first such query. That behavior seems to be associated with IE7 but not IE6 for example.
If you have a CD with the QRZ database installed you can use that CD or its' stored contents on a hard drive. Simply specify where the CALLBK directory can be found and enable the QRZ radio button.
If you are a paid subscriber to either QRZ or Hamcall xml database service then you can specify that fldigi use that service for all Callsign data base queries.
OK2CQR provides a very nice callsign lookup service on his hamqth.com web site. There is no subscriber fee to use this service. Simply register and then use your registered user name and password for access. You might want to provide monetary support to Petr if this service meets your needs.
EQSL
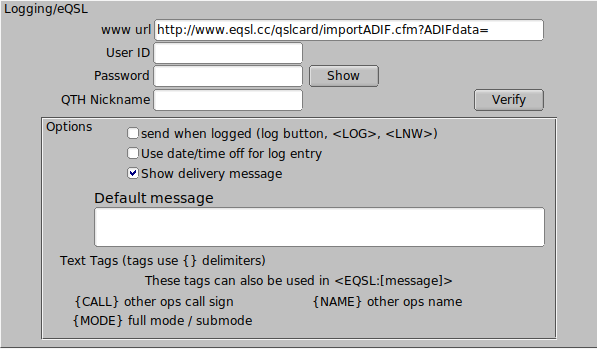
Configure the eQSL log entry upload with your user ID, password, and QTH nickname. See Macros for additional information.
FLdigi Logging

If you check the "send when logged" button then the logged record will be sent to eQSL when either the log it button is pressed, or when the macro tag <LOG> or <LNW> is executed.
You may elect to use the default of date-time ON or date-time OFF for the eQSL submission.
You may send a message with the log record. If you fill in the default message text then it will be used for that purpose. You might want to use something like:
Tks for {MODE} qso {NAME}. 73, pse eQSL
Verify
Download an adif formatted record file from eQSL and save it to a convenient location on your computer. Then press the "Verify" button and fldigi will try to match your records with the eQSL download record; updating each matched record's eQSL date received data element.
Logbook of the world
fldigi does not have a direct connection for uploading and downloading LoTW records. Instead, it uses the tqsl program that each LoTW user will have on his or her computer. The tqsl program is usually used with it's graphics user interface, especially on Windows and OS X computers. But it also can be opened in a 'command line' mode in which the user dialog is never visible. fldigi passes the logbook records as a batch adif file via tqsl using this command line mode.
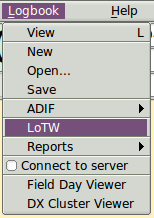
Open the LoTW configuration dialog from the Logbook menu:
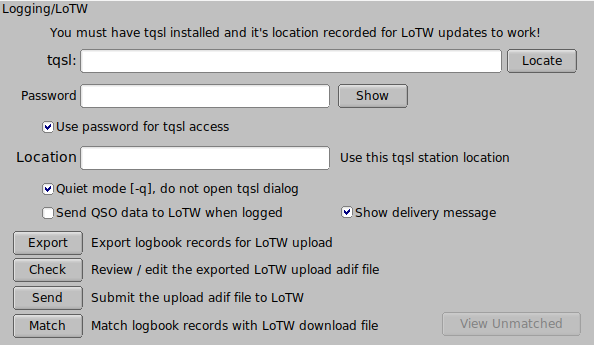
Use the "Locate" button to open an OS file finder dialog to locate the tqsl binary. Click on it when found. The above image shows this on a Linux computer. On OS X you need to open the Applications folder, and then drag and drop the tqsl icon on to the 'tqsl:' control. You will see /Applications/tqsl.app in that control after the drag and drop.
As a LoTW user you will have created at least one and possibly two passwords for system access. The first is your web access password and the second is the tqsl application password. The tqsl application password is optional. If you use a tqsl application password then you need to enter that in the Password control and also enable the "Use password..." check button. LoTW also provides for managing the LoTW data for specific locations. My LoTW logbook has data for the past two QTH locations. Enter the location for which the LoTW records will be relevant. Case is significant in both the password and the location entries.
Leave the "Quiet mode" unchecked until you are comfortable with fldigi's LoTW interface. If unchecked the tqsl dialog will open each time the "Send" button is selected. Checked and the tqsl dialog will not open.
If you never tweak the logbook entries, then enable the "Send QSO data..." check box. If checked each saved logbook entry will be sent individually to LoTW via the tqsl interface. Leave it unchecked if you want to review and possibly modify the records before the LoTW upload. When unchecked, fldigi will accumulate the adif records in an adif upload file. This file is not on disk. It is only a memory image of the file and is therefore volatile. Exit fldigi before submitting the LoTW records for upload and the memory image is lost. BUT the data is still available for LoTW upload.
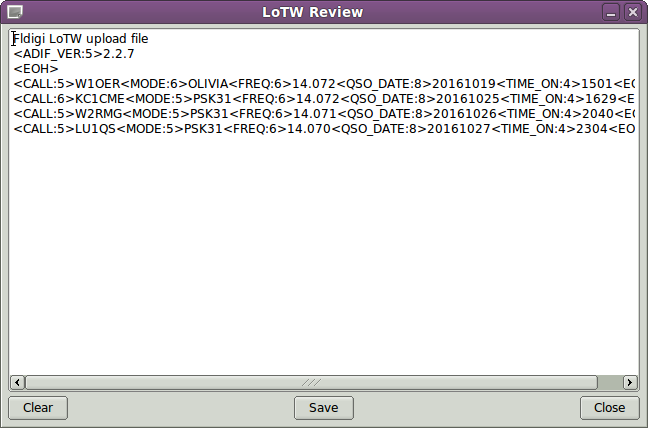
The text box is an actual editor. You can modify or delete a record line, or just clear the entire image file contents. If you modify the file then you must save it before taking any subsequent action to upload the file to LoTW. Be sure you fully understand how to change the ADIF record before attempting to make changes. tqsl will reject mangled records.
You can create a new update file image, or append new (or corrected) records using the Export button. This will open the Export dialog:
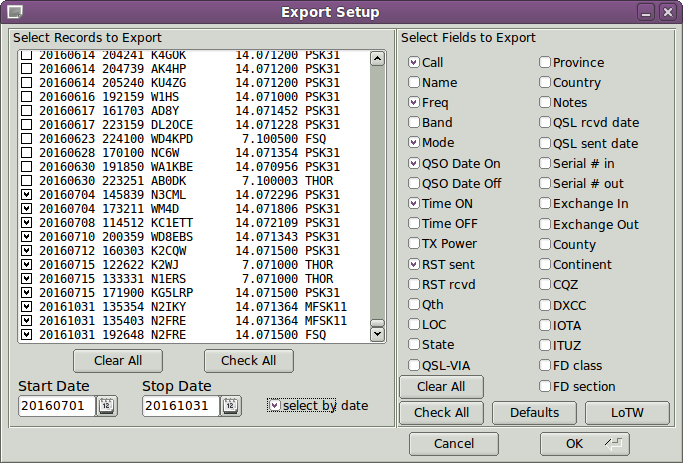
Press the LoTW button to present the field selection. Then select the desired records either individually, all, or within a date block. The above image shows a date selection of all records between July 1 and October 31 of this year. When OK is pressed the upload image file will either be newly created or appended with the selected records.
View the upload image file again to insure you have not duplicated any records. tqsl will reject any that are duplicates if you forget this step.
When all looks OK you can upload the records using the Send button on the LoTW config dialog.
Verifying local against LoTW download
Download a set of adif records from LoTW using the LoTW web interface. Save the download file to a convenient location. Then press the "Match" button and fldigi will try to match your records with each LoTW download record; updating each matched record's LoTW date received data element. If the LoTW download was make using an extended format than fldigi will also update these adif fields if present in the LoTW record:
- LOTWRDATE - LoTW received date
- DXCC - dxcc entity number
- CNTY - county name
- COUNTRY - country name
- CQZ - CQ zone number
- GRIDSQUARE - Maidenhead grid square reported by QSL's station
A brief report will be given in a message dialog at the conclusion of the matching effort.