Table of Contents
The same control is used for both manual entry of the transceiver frequency or with full CAT control. When no CAT is available the control is simply a convenient way of keeping track of the transceiver USB/LSB suppressed carrier frequency, the mode and the audio tracking point. If fldigi is being used with an FM transceiver you probably should enter the simplex frequency or the input frequency of a repeater being used. This frequency value is used with the waterfall audio frequency to compute the logged frequency. The logged frequency value will only be correct for LSB and USB operation.
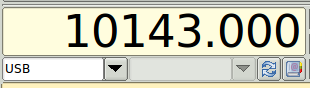
The combo box on the left will allow the selection and control of the operating mode of the transceiver.
The combo box on the right will allow the selection and control of the transceiver's receive filter bandwidth.
The frequency display is also a control; it displays frequency in kHz. In addition to allowing you to set the rig frequency, it will track with changes made on the rig itself.
The number of digits that may be entered displayed is currently hardcoded to seven digits to the left of the decimal and three to the right.
If you are using rigCAT (i.e., a rig XML file containing command definitions and minimum and maximum allowable frequencies), an entry outside the limits will not be sent to the rig - the display will revert to the rig frequency following the next rig poll cycle.
If you are using flrig for rig control, an entry outside the limits will be sent to the rig; the rig should reject the command and the flrig and fldigi displays should revert to the current rig frequency.
If you don't use rig control, the maximum frequency is 9,999,999.999 kHz.
The maximum frequency based on the number of digits displayed is given in the tooltip. Note that this may be greater than the maximum frequency possible for your rig.
You can set the frequency two ways without the control being in "focus" and several more ways with it in focus.
With or without Focus
- Move the mouse cursor over a digit and roll the wheel
- Highlight a numeric frequency in text in the application and then move the mouse cursor over the control and press the middle mouse button to paste selection
With Focus
Shift Click (left mouse button) in the control to set focus. The foreground and background colors reverse to indicate the control has focus.

Each digit is sensitive to the mouse. Clicking the left or right button over the top half of a digit increments it while clicking over the lower half decrements it. Holding the mouse button down will cause the number to rapidly increase or decrease. Alternatively, you can roll the mouse wheel with the pointer over a digit and it will scroll the digit. In all cases the numbers "roll over" - i.e., you can change the digit you point to and all digits to the left of it.
Arrow and Page Up / Page Down Keys can be used to increment and decrement digits. Digits are numbered 0-9, right to left, with the digit's significance matching that of the rig's display. For example, if the rig's resolution is 1 Hz, D0's range is 0-9 Hz.
| Keys | Normal | SHIFT + key | CTRL + key |
|---|---|---|---|
All of the foregoing change techniques result in immediate changes to the frequency of a controlled rig.
There are two additional ways to set the frequency when the control has focus: PASTE from clipboard and direct keyboard entry.
You can paste from the clipboard (Ctrl/Meta-v) in addition to from the Selection buffer (middle mouse button). When pasting from a selection (highlighted number), the selection must be from text within the application whereas the clipboard paste will paste values copied from any application. The value pasted is expected to be numeric in units of kHz and can include a decimal point. If the value being pasted would exceed the maximum frequency allowed, the Paste action is silently ignored. Paste actions result in an immediate command to set the frequency on a controlled rig.
Lastly, you may enter a frequency directly from the number keys or keypad of a keyboard. Enter the frequency in kHz, including decimal point if there are non-zero decimal components, using either the number keys or the keypad. You may use any legal floating point format. For example:
- 7070
- 14070.235
- 14.07e3 (Remember that the numeric value is in kHz so this example is 14070 kHz or 14.070 MHz)
When you press the first number, the decimal point in the display will blink to indicate you are in numeric entry mode. While in numeric entry mode, all other entry modes are disabled (i.e., no mouse clicks, rolls, or pastes are possible).
Continue to enter numbers, and optionally a decimal and more numbers. The value does NOT get sent to a controlled rig until you press the ENTER key. Pressing the ENTER key sends the value to the rig and exits the numeric entry mode.
If you want to make changes as you are entering numbers, you can use the backspace key to delete undesired numbers digit by digit, or Ctrl/Meta-Backspace to clear all digits on the side of the decimal point you are currently entering; use Ctrl/Meta-Backspace again to clear the left of decimal numbers as well if you have already entered a digit to the right of the decimal point, and then resume entering numbers.
If you attempt to enter more digits on either side of the decimal than there are digits available, the excess digit entries are ignored.
If you want to abort the process you can press the ESC (escape) key or click outside the control in a widget that will take focus (like a text field) or outside the application and the frequency will remain as it was; this exits numeric entry mode.
The Smeter / Power-meter display is only active if fldigi is configured for xmlrpc control with flrig. The transceiver must support the smeter and power out CAT query. fldigi does not try to estimate the Smeter reading based on the audio stream. You can toggle viewing the Smeter / Power-meter display using the button just to the right of the shared space used by the "Smeter/Power-meter" and the "Mode/Bandwidth" controls. Be sure to save the configuration for this to persist the next time fldigi is executed.
The mode combobox, the bandwidth combobox and the frequency display also annunciate the current transceiver status. If you change operating mode on the transceiver, that will be annunciated in the respective combobox and fldigi will adjust any internal parameters accordingly. fldigi queries the transceiver 10 times per second to maintain a lock step with the transceiver.
Frequency List
The frequency/mode pick list is displayed when the book button is pressed. Pressing the book button a second time will restore the original logging panel.

The pick list buttons control selecting, adding and deleting entries in the frequency/mode list. From left to right, top to bottom:
- load the parameters highlighted in the current list entry
- add an entry containing the current rig frequency / rig mode / modem type / modem audio center frequency to the list
- delete all entries from the list (a warning prompt will appear)
- delete the highlighted entry from the list
- pop up menu with active frequencies based on spots reported from spotters in the Maidenhead grid locator entered for the station during fldigi configuration or a locator specified in the entry field to the right (see pskreporter/spotter)
- entry field for Maidenhead grid locator spotter filter for active frequencies search; for example "EM"
The browser list contains rig frequency, rig mode, modem type, modem audio center frequency, and text describing usage. To edit the usage string:
- highlight the entry to be edited
- press the combination of SHIFT and right mouse button while pointing to the line
This will hide the frequencies browser and display the data relative to that line

Edit the text entry and press the "Enter" button when finished.
The list is saved when fldigi is shut down.